
Interactive testing with Wallaby.js
Here at OVO Energy, we like to keep our test coverage as high as we feasibly can. This obviously involves writing a lot of tests, which can sometimes become difficult and lead to some pain points that I’m sure you’ve felt before:
- Tests can take too long to execute,
- Sometimes it’s difficult to know on-the-fly how our newly added code and tests can be affecting overall coverage stats,
- Tests can be difficult to debug, especially if we didn’t write the failing test or underlying code ourselves, or
- Maybe we just want to know what the state of something is while our test is executing without having to trawl through hundreds of lines of test output.
Let’s talk about a tool that can make our lives just that little bit easier.
Enter Wallaby.js
Wallaby is a plugin that integrates with most major editors and allows us to run our tests continually whilst providing feedback in your editor. This is especially helpful as it means we can save on screen real estate by not having a terminal running alongside our editor (or inside the editor itself) and get feedback alongside our cursor and file windows as we type out our tests. Take for instance the following project — it uses ES6/Webpack and looks like this:
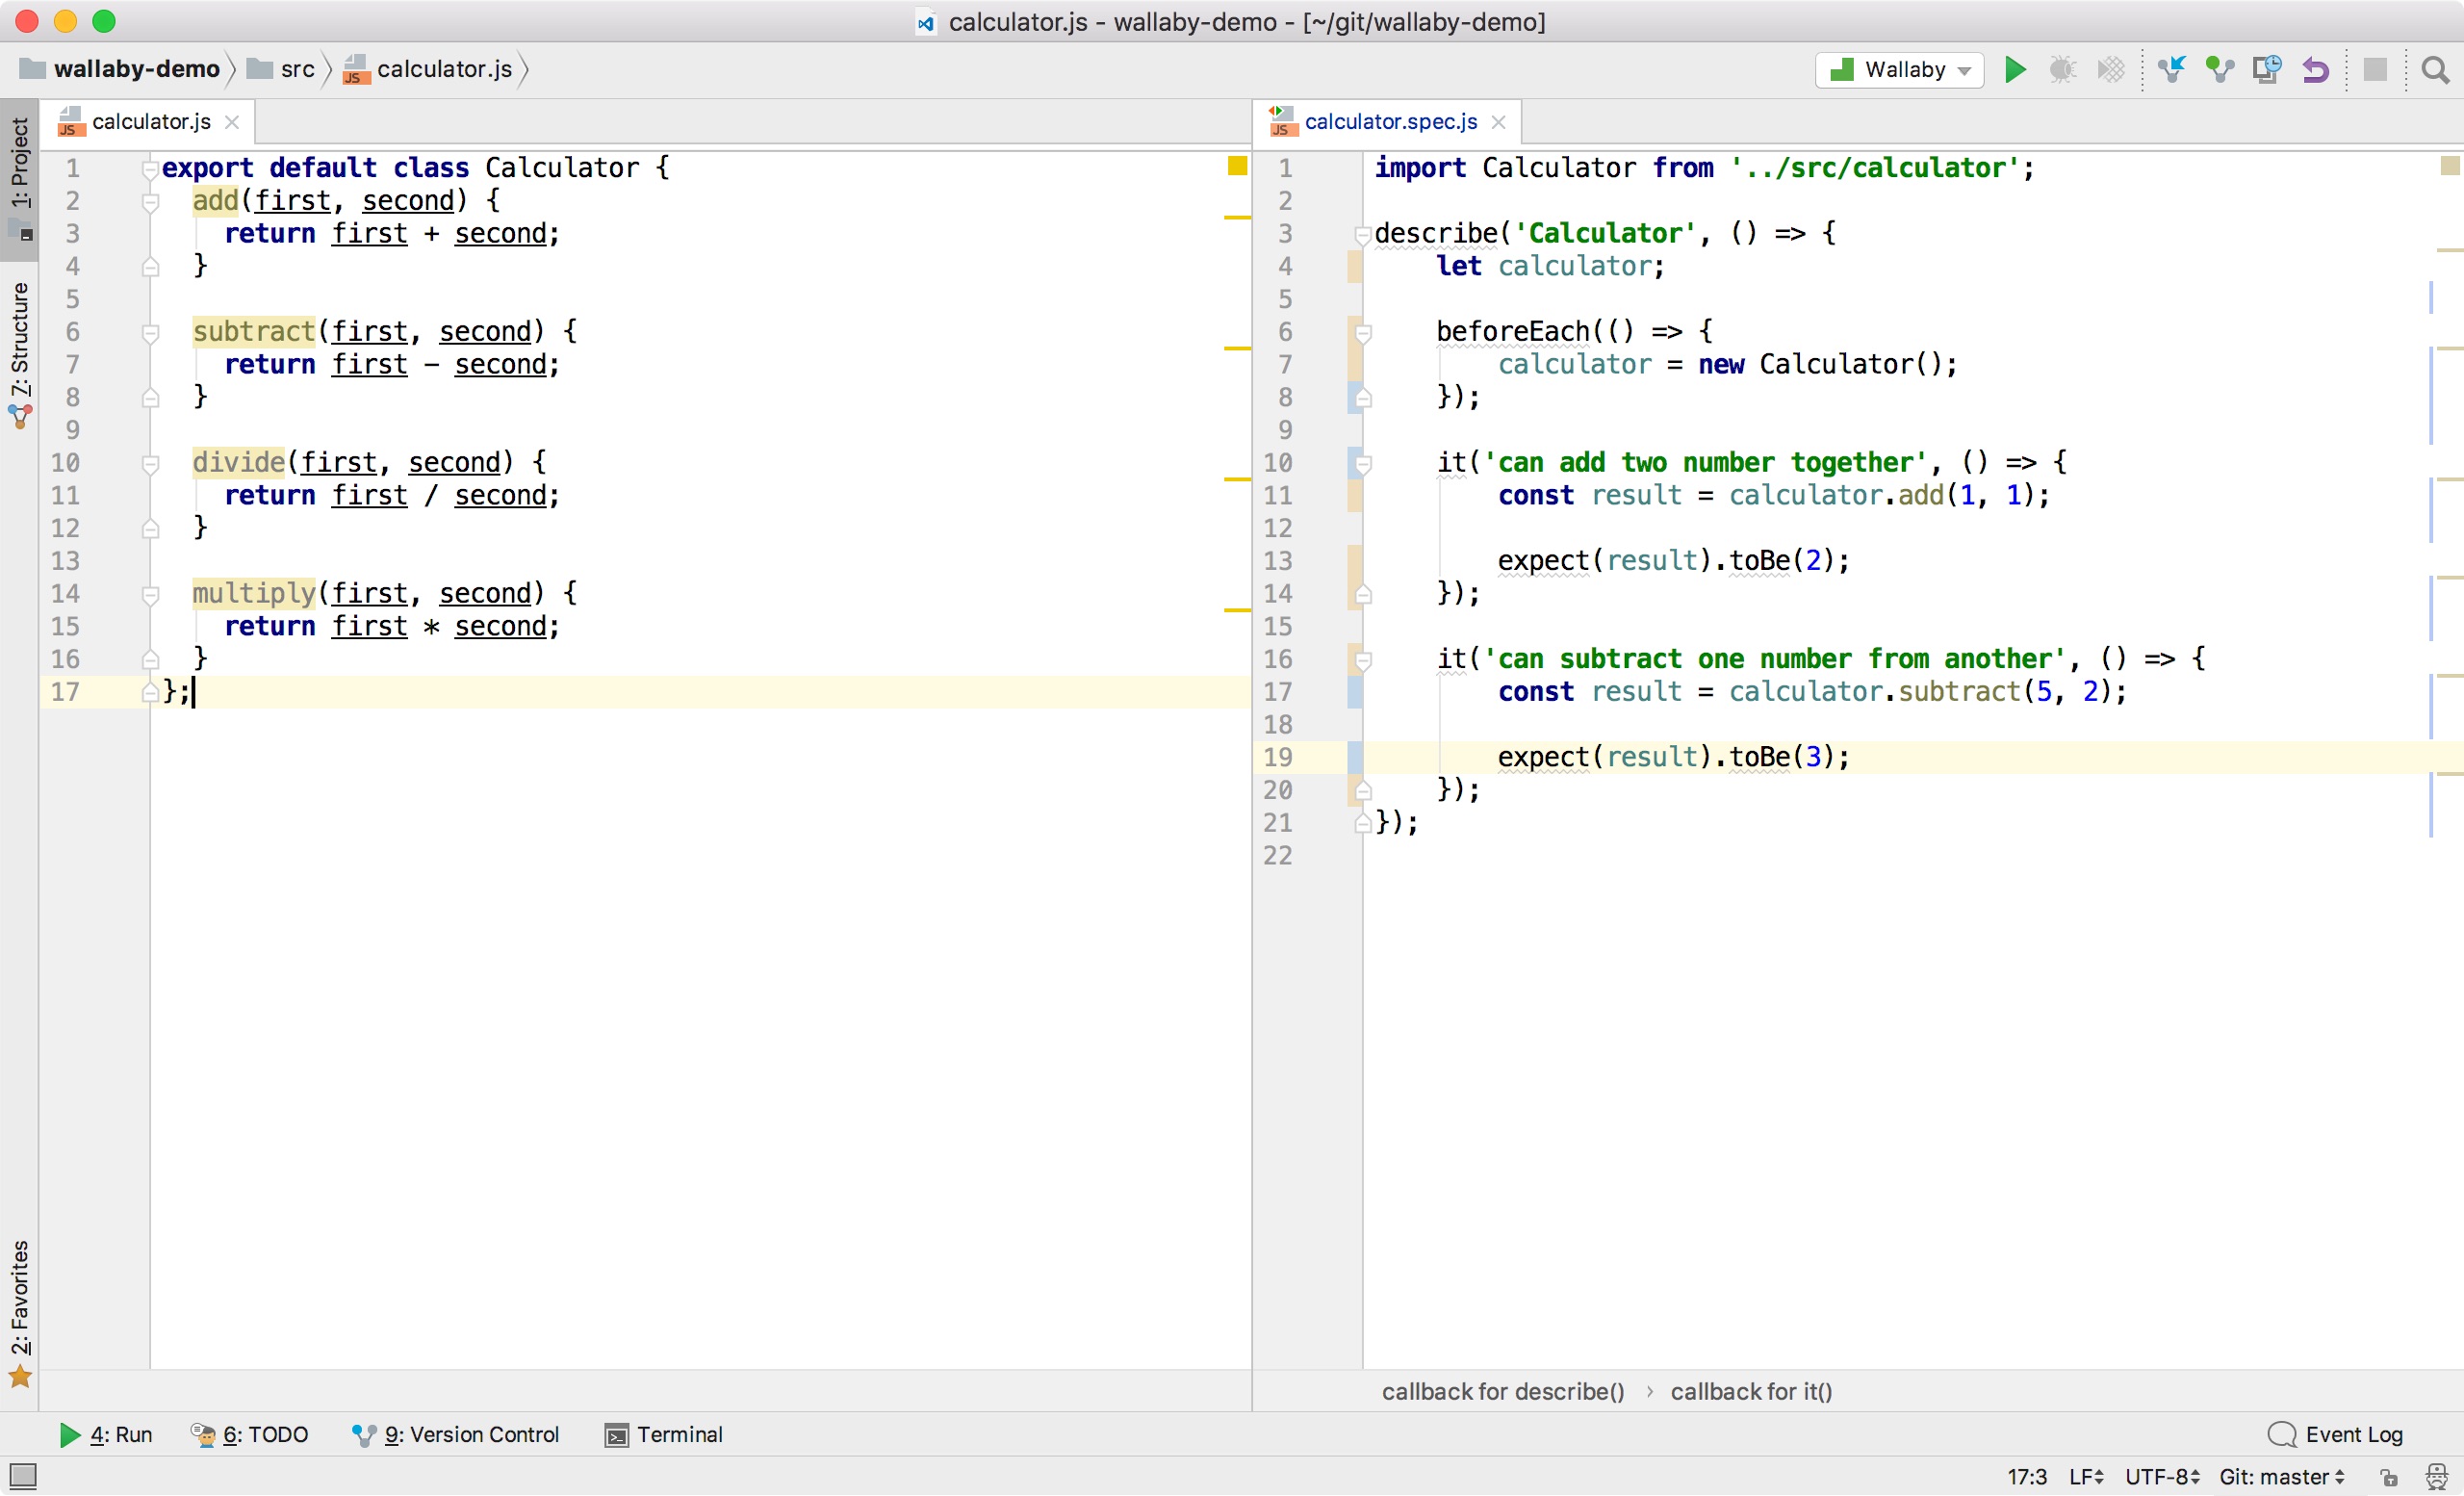
It’s a simple calculator application that gives us some basic functions to add/subtract/multiply/divide two inputs. If I want to run my tests, I can open a terminal and run yarn test and observe the output. Some editors have terminal window integration which makes this slightly less cumbersome, but if I’m on the road and limited to a 13-inch display, it’s still not a great use of screen real estate.
To integrate Wallaby with our sample project, all we need to do is install the plugin for our editor (Sublime Text in this example) and create an appropriate wallaby.js file for the project. The Wallaby website describes how the configuration object works in great detail as well as providing plenty of example repositories with different configurations. For the most part, you will be doing the things to your code in order to make it run in a test environment such as transpiling files.
The wallaby.js file for our sample project looks like this:
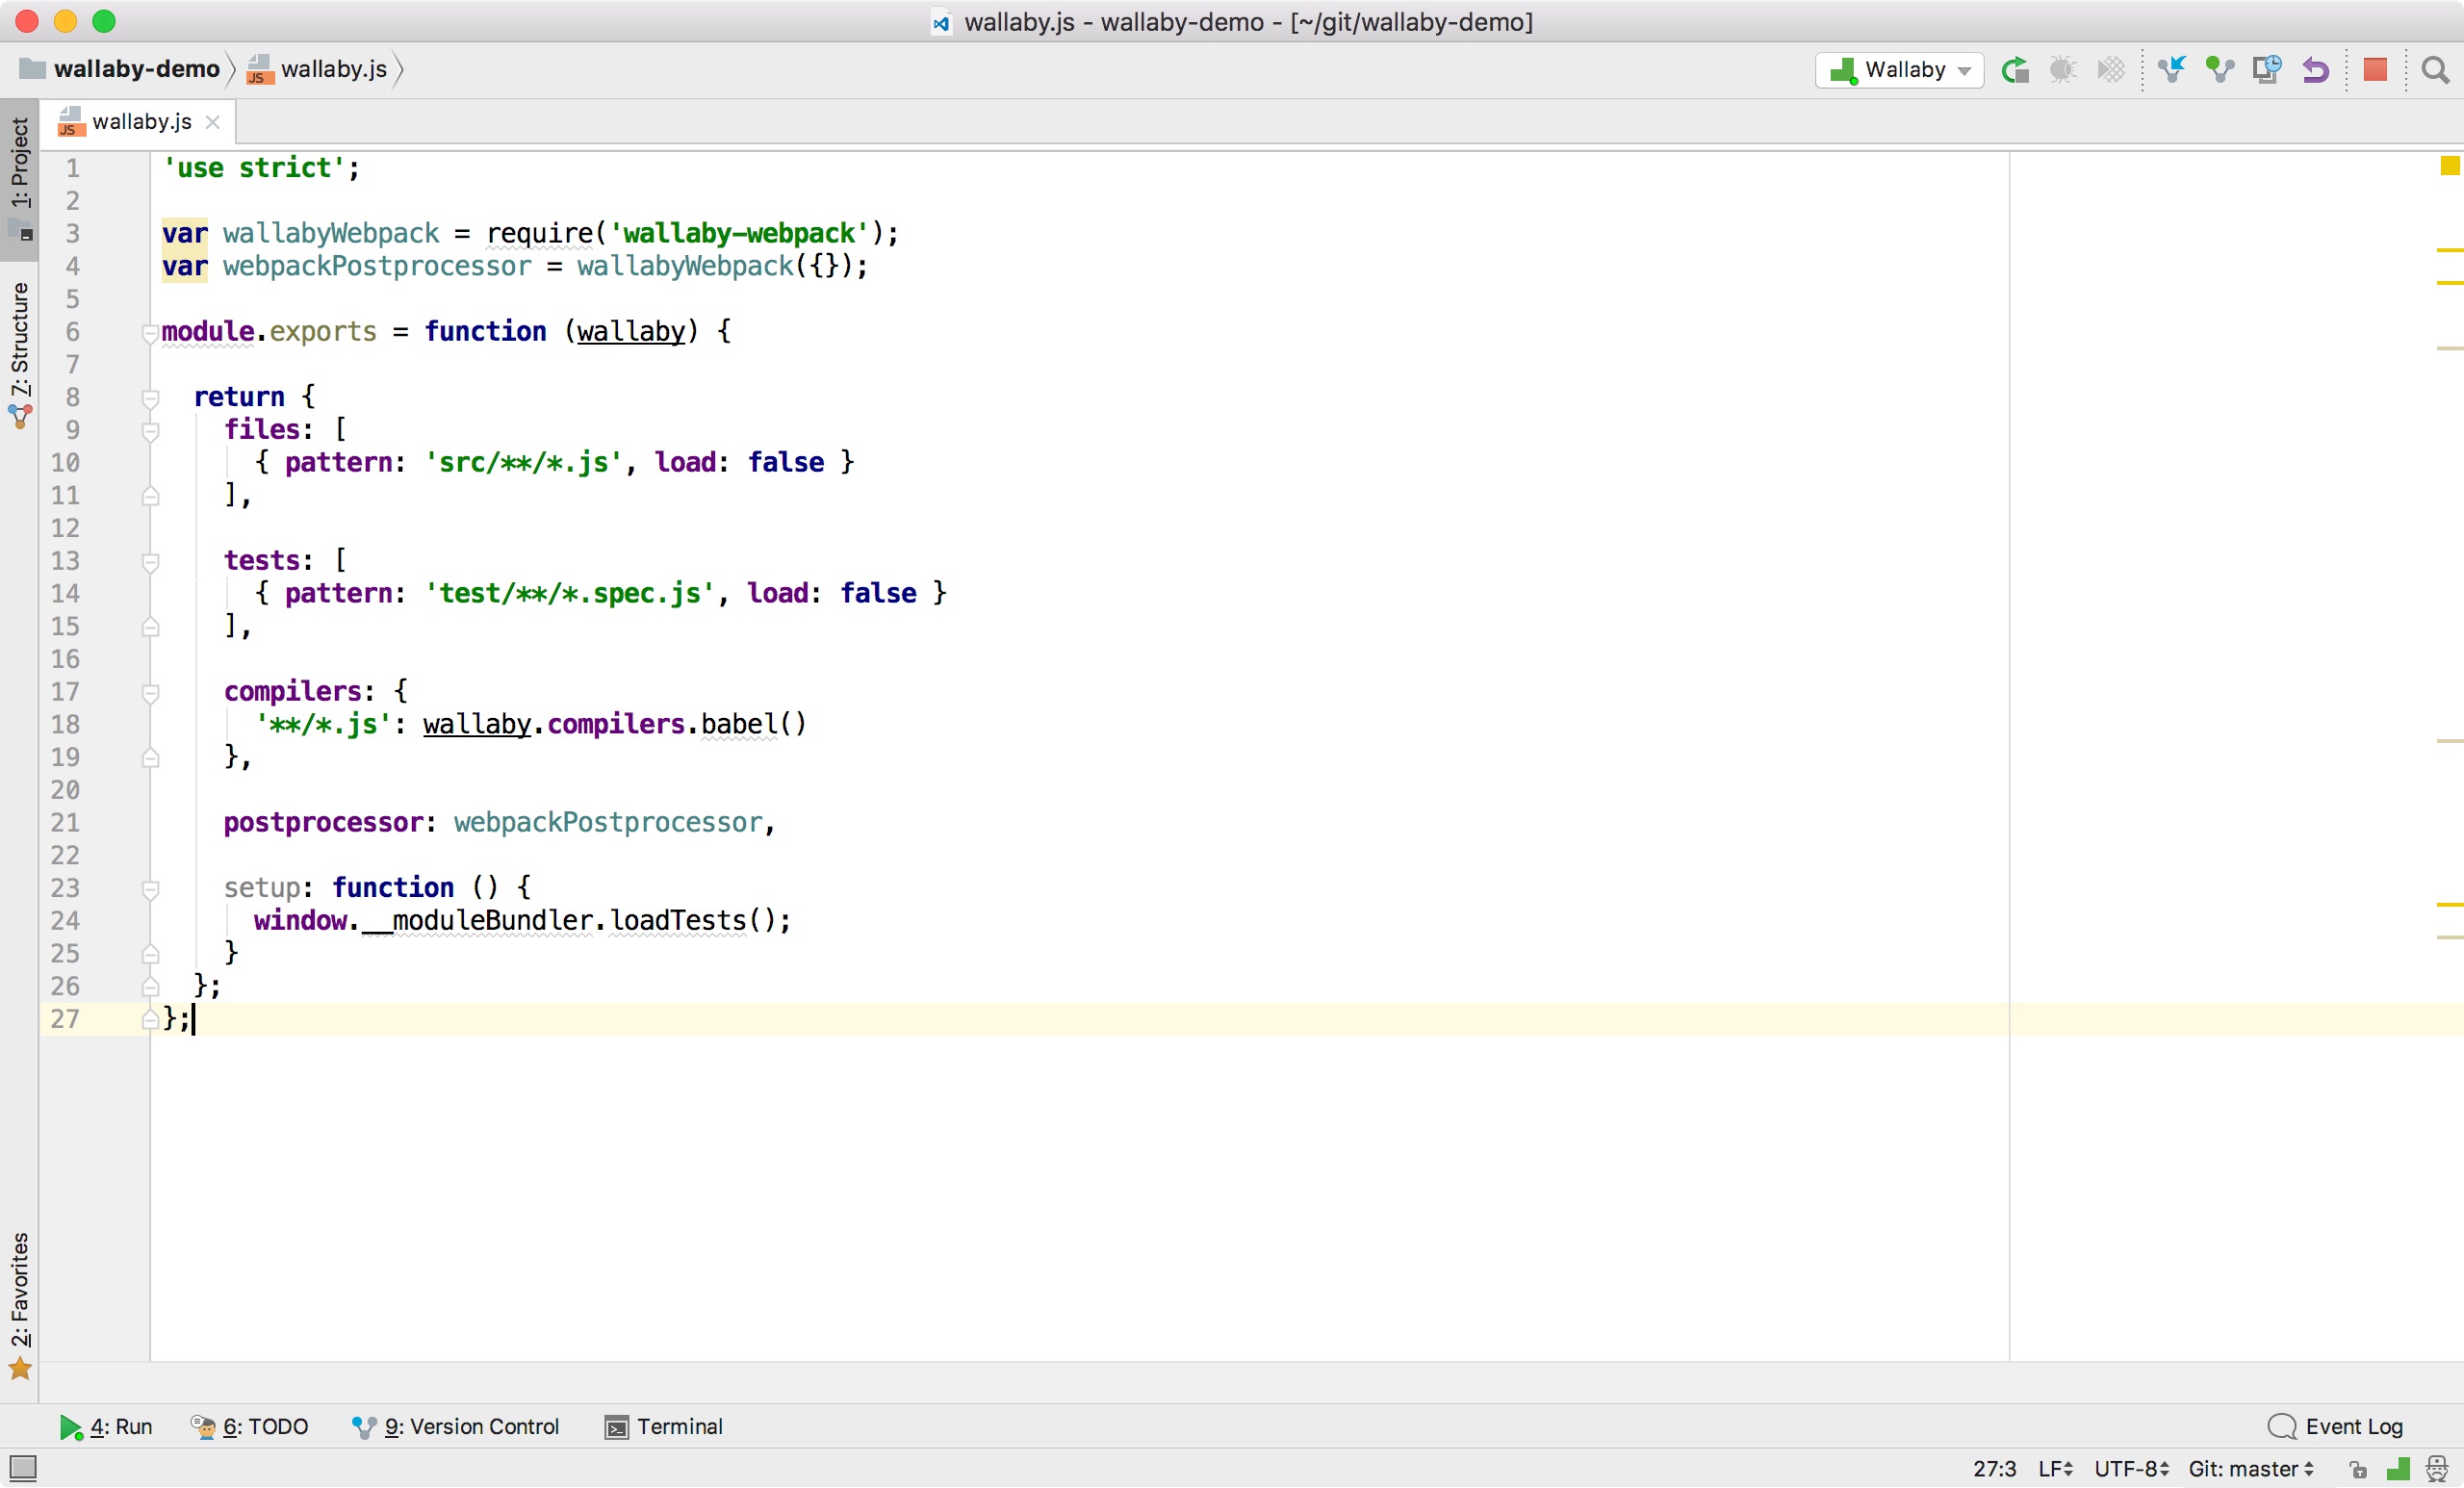
As you can see, this looks similar to a Karma configuration file where we specify our project files, test files and any compilation/post-processing that needs to take place for our files to run. Out of the box, we are given access to Jasmine for unit testing, but we are also able to specify another test framework in the configuration object. So we have Wallaby installed and a configuration file written. What does it look like when we fire it up?
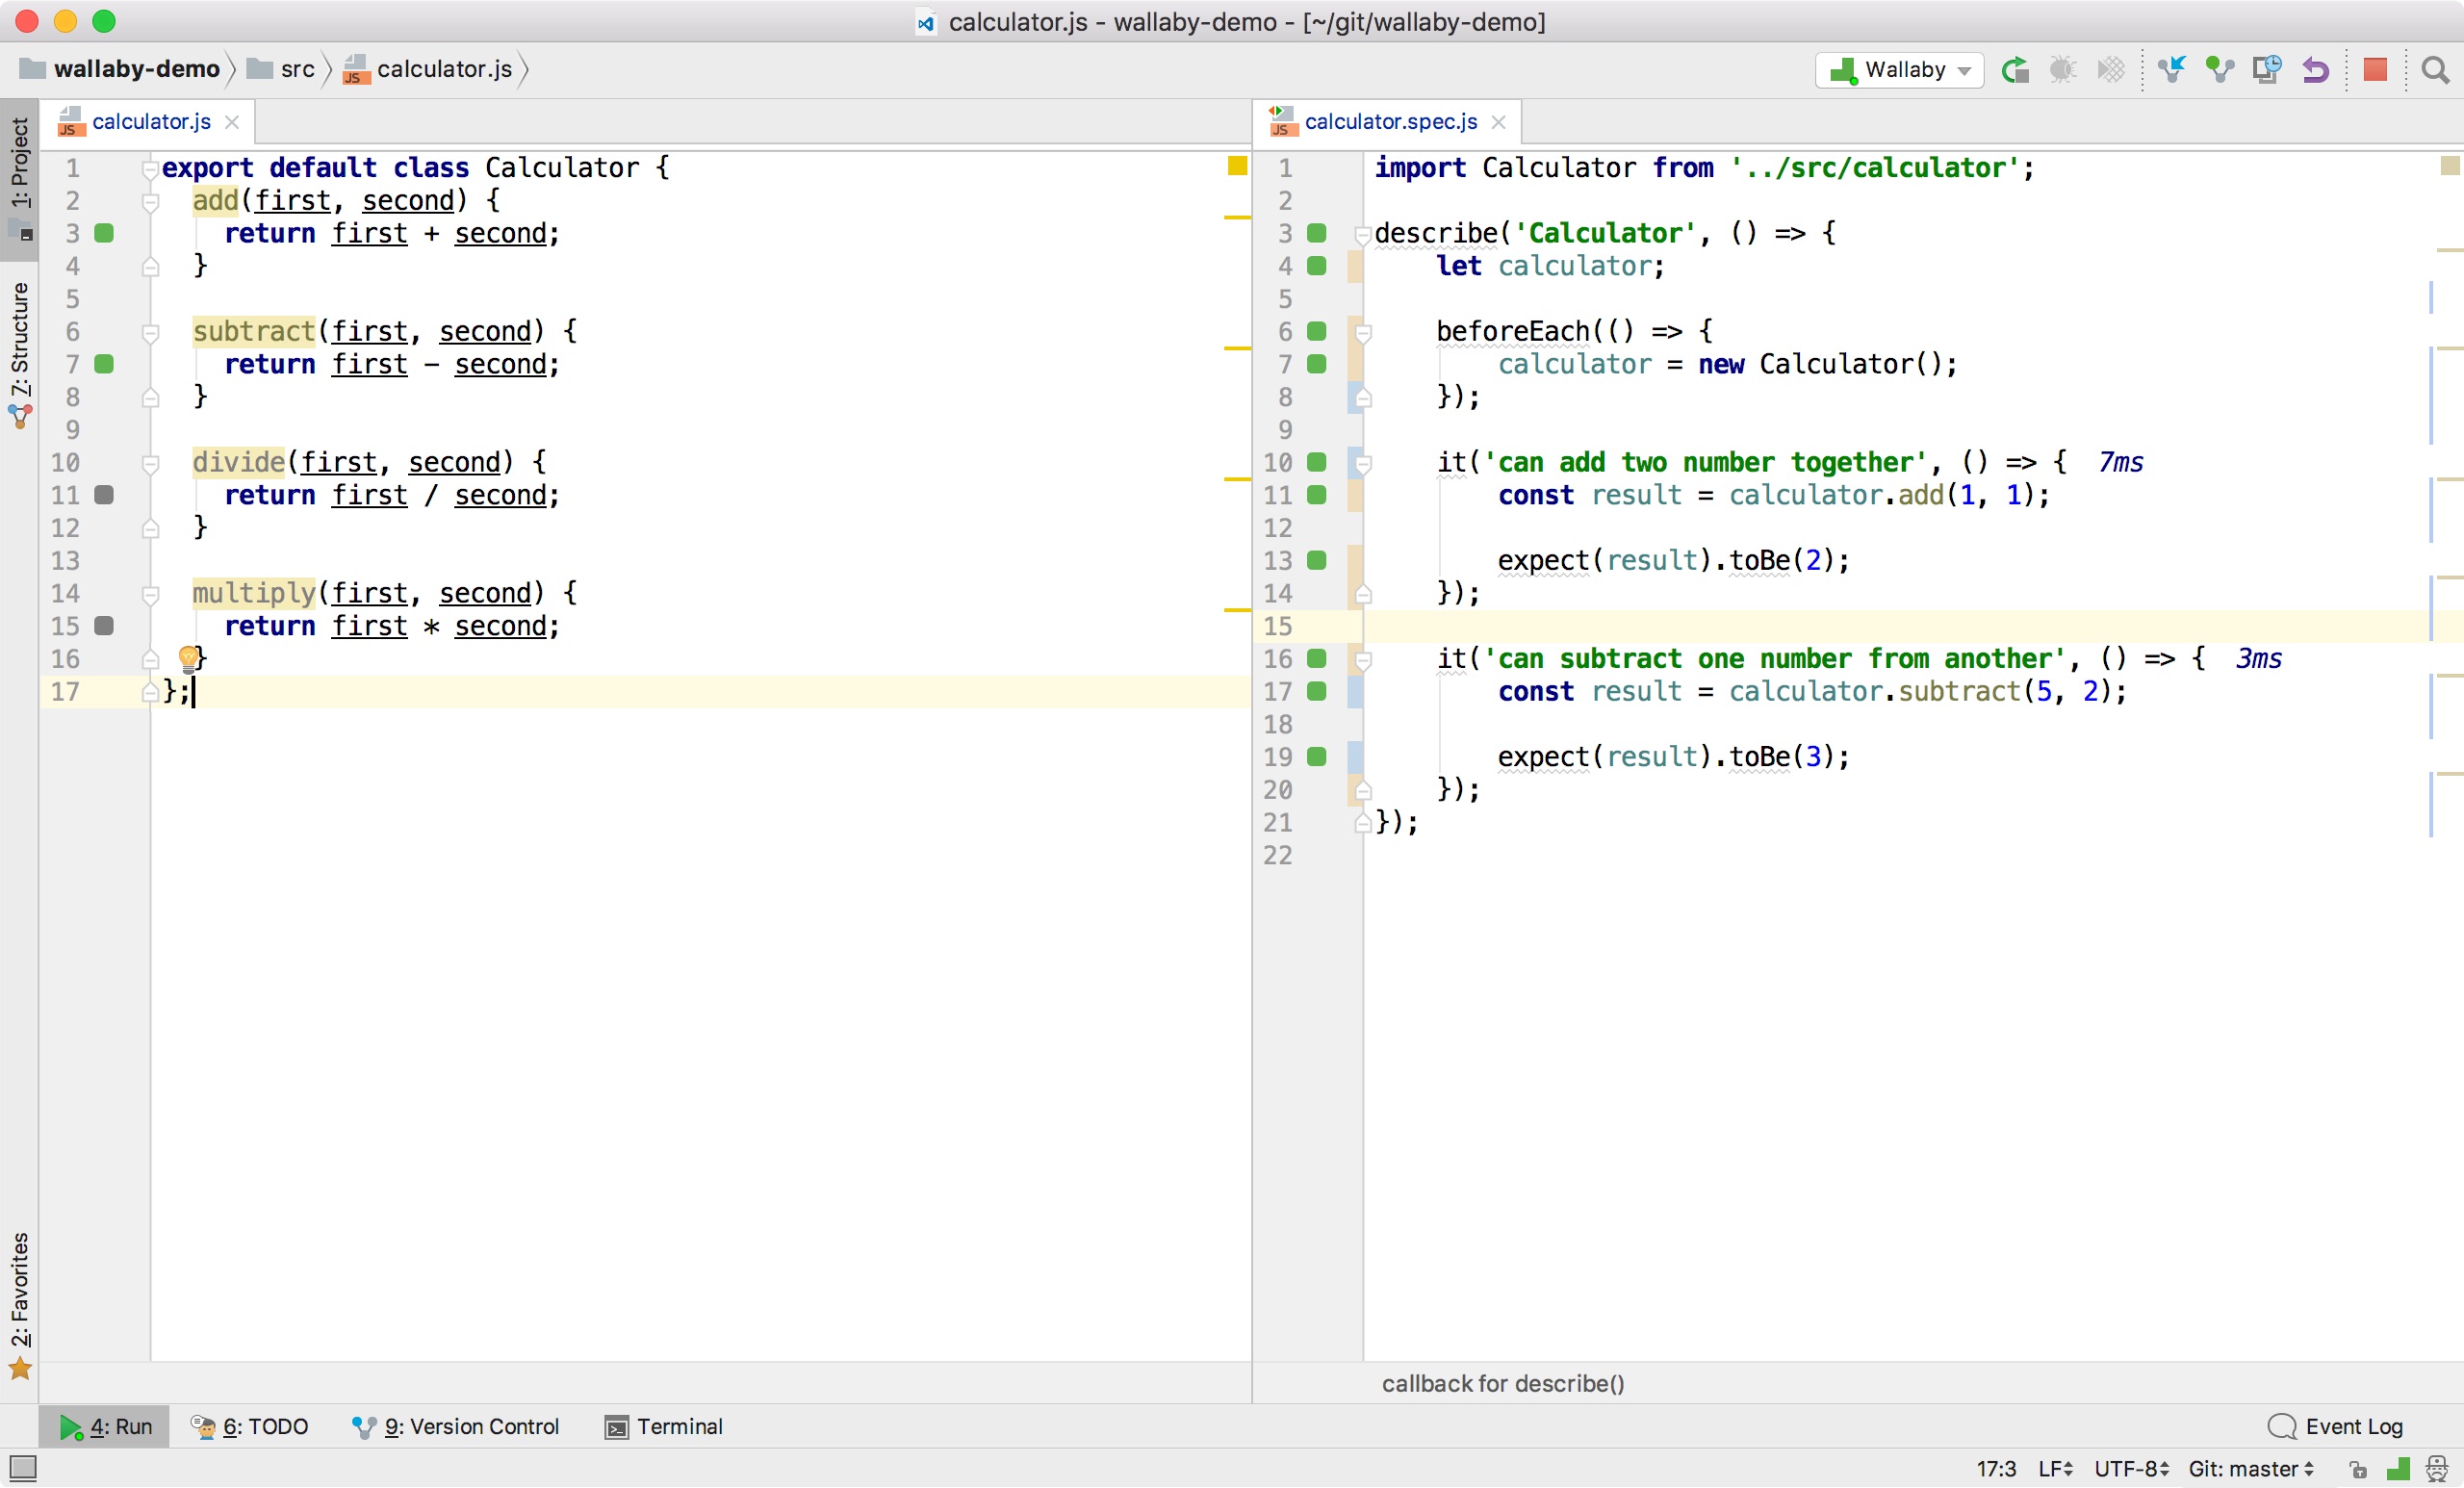
We now have a couple of noticeable differences to our files. First is that we have some coloured boxes next to our line numbers. These are indicators about our tests and code such as code not being covered by a test (grey) or that the line of code is covered by a test and there are no errors (green). We also have an indicator as to how long a test took to complete just to the right of the it block declarations.
Let’s add a new test and see what changes:
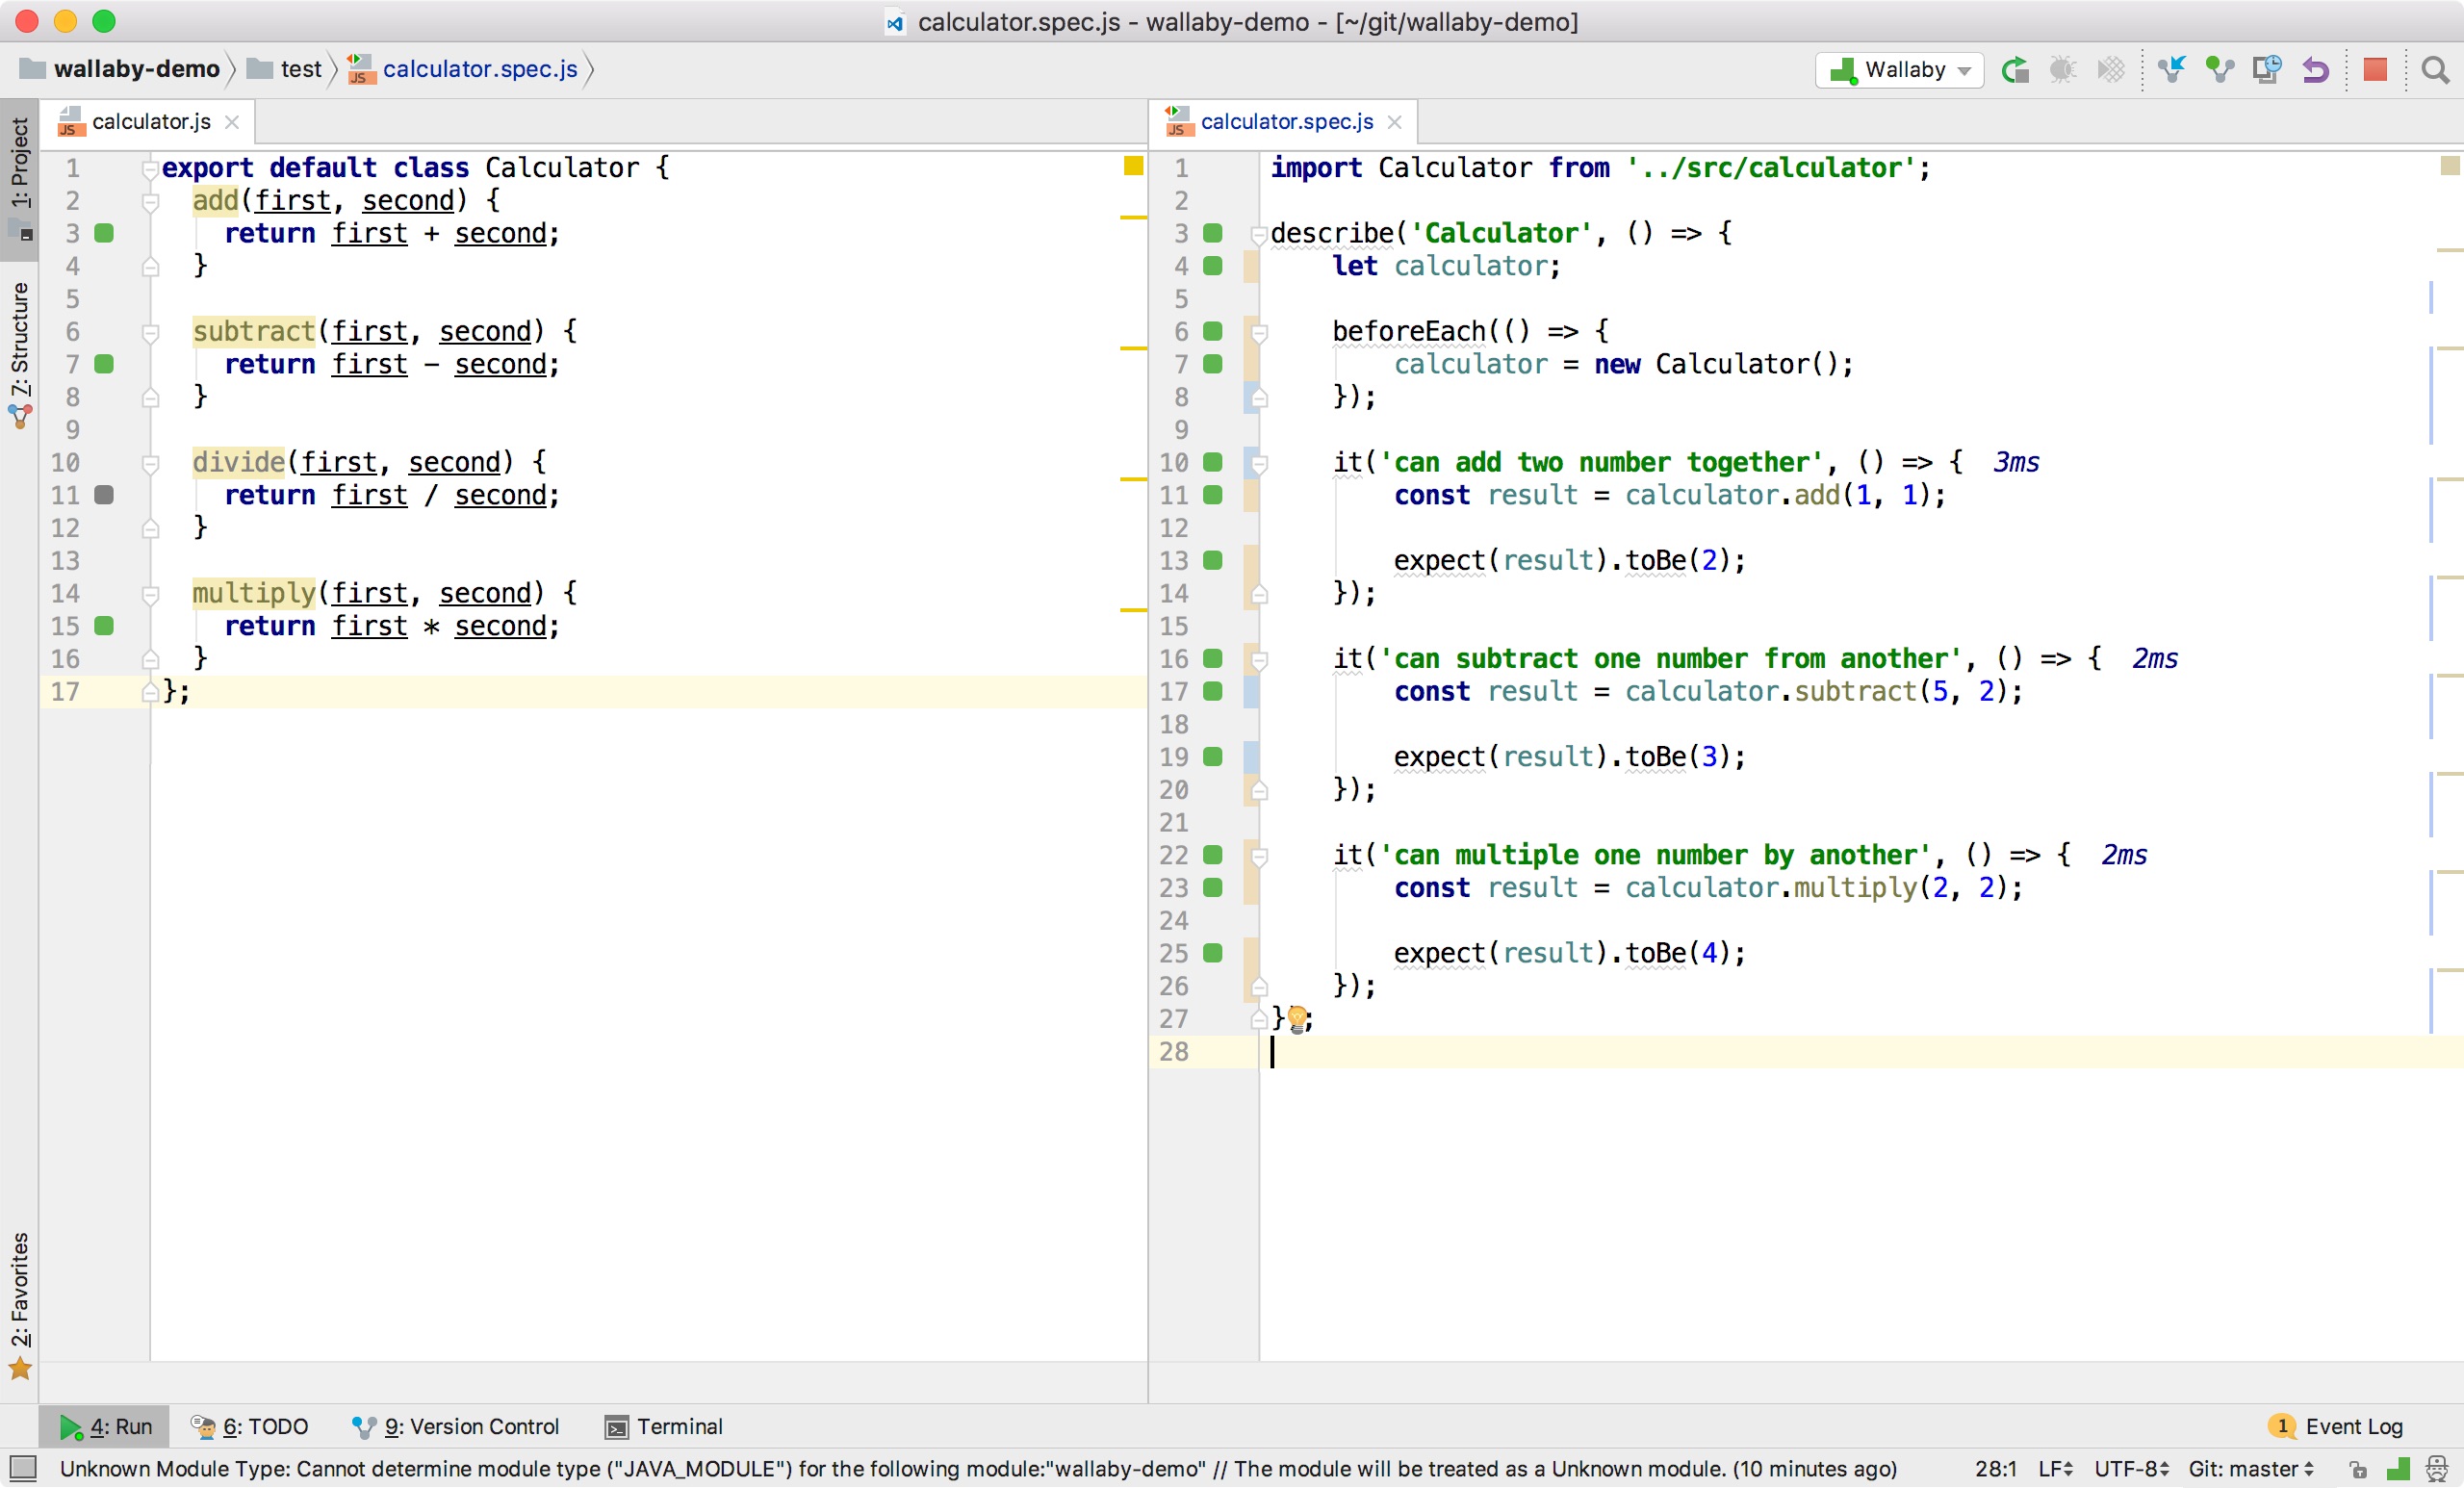
We can see that now the line inside our multiply function has a green box.
What happens if our math is bad and we make the wrong expectation:
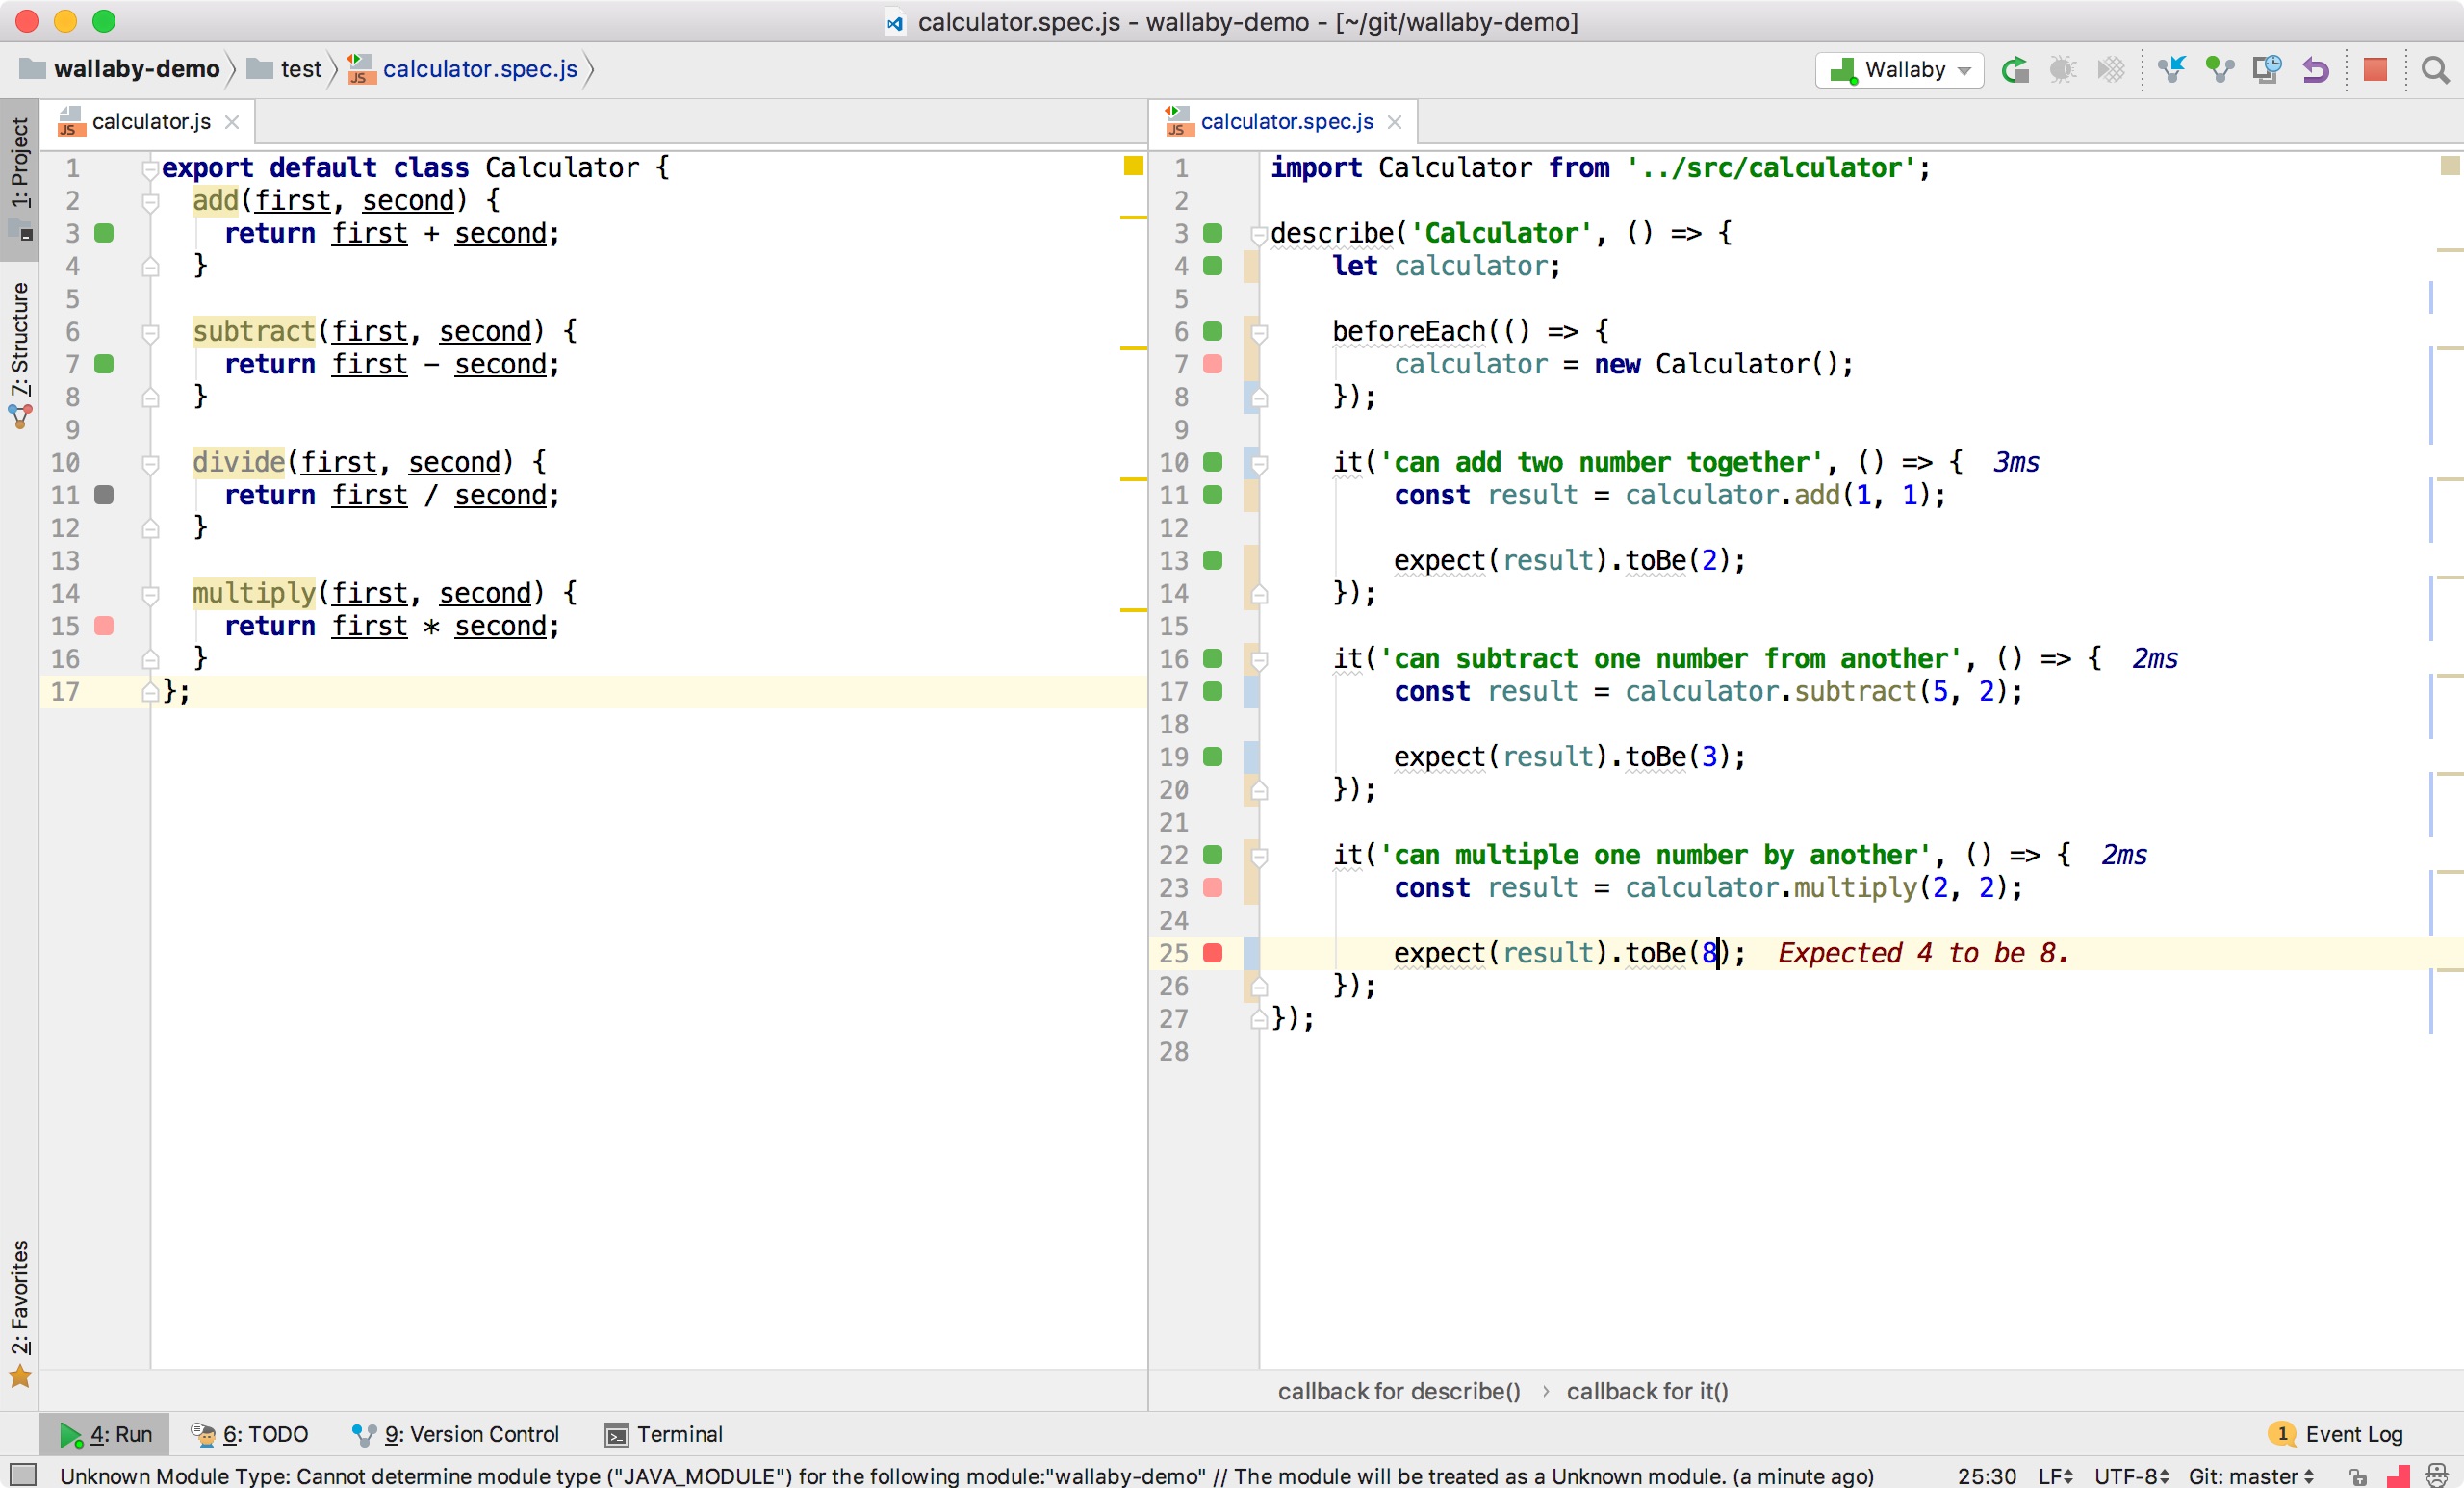
Uh oh! Our test has failed, but it is quite obvious in our editor where the root of the problem lies. Furthermore, we even get the test output inside our editor which helps us diagnose the problem a lot quicker than if we had to trawl through test output in a console.
We can also run console.log() and get output inside our editor in the same way:
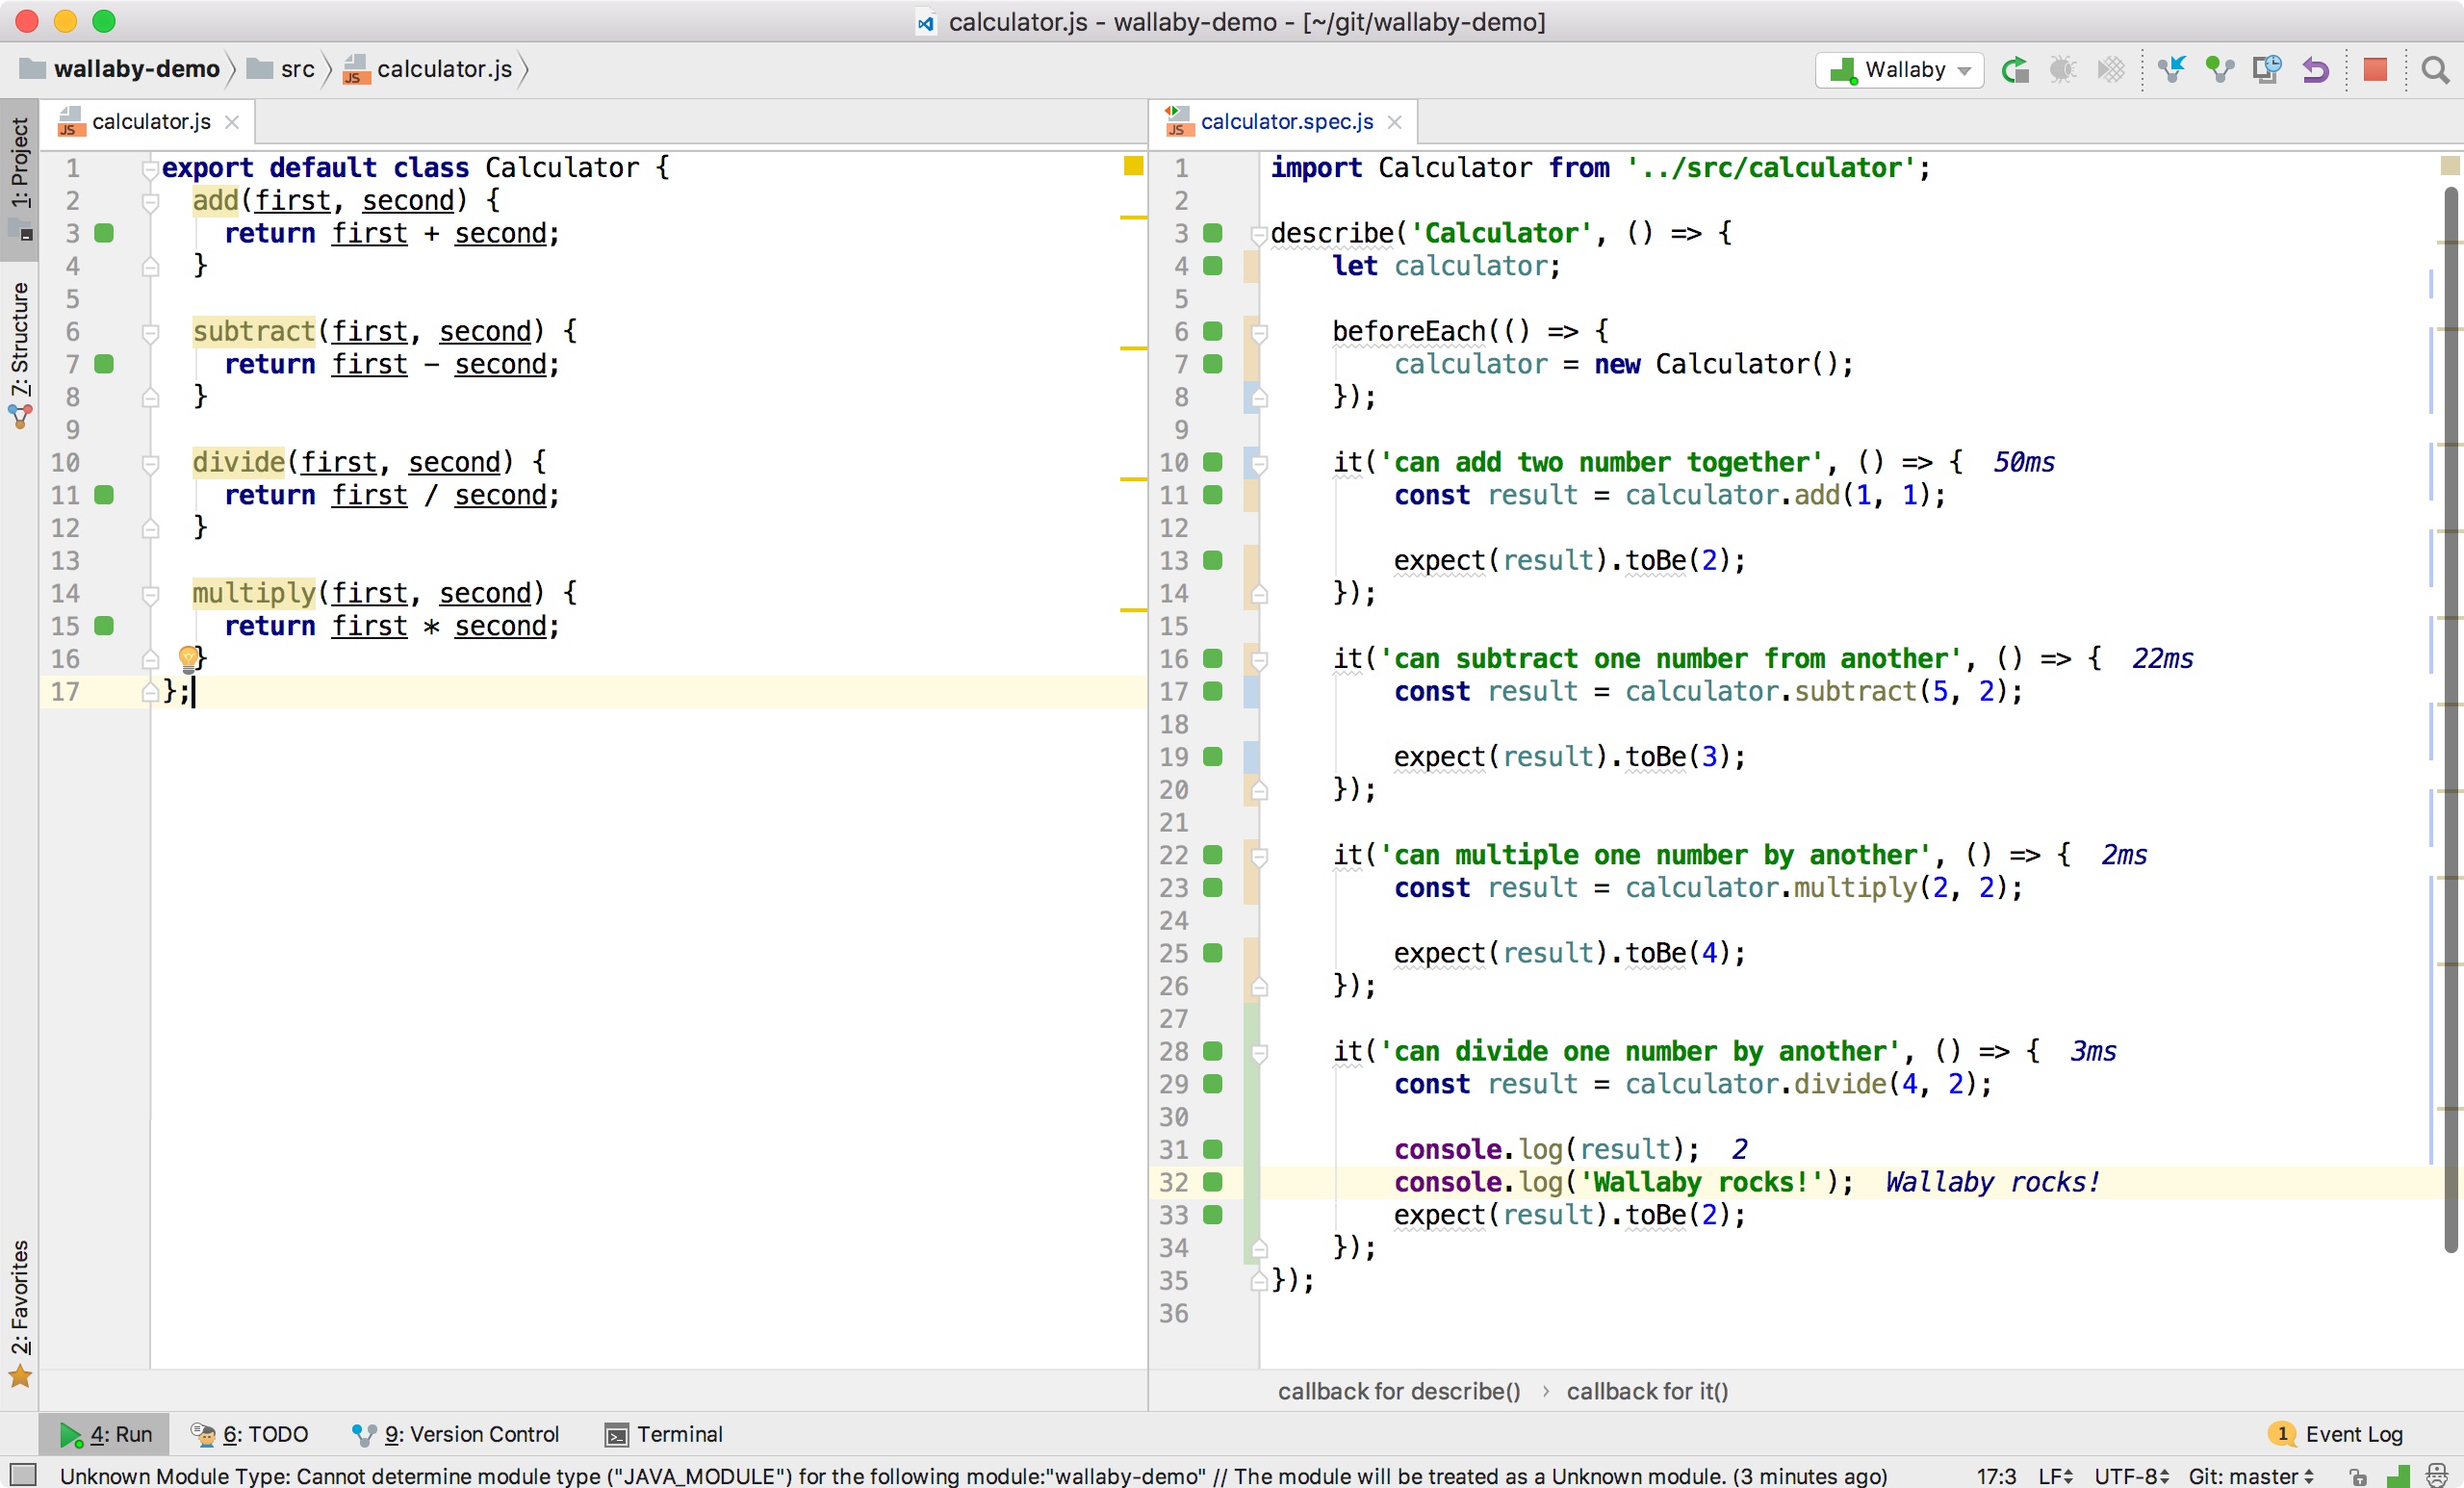
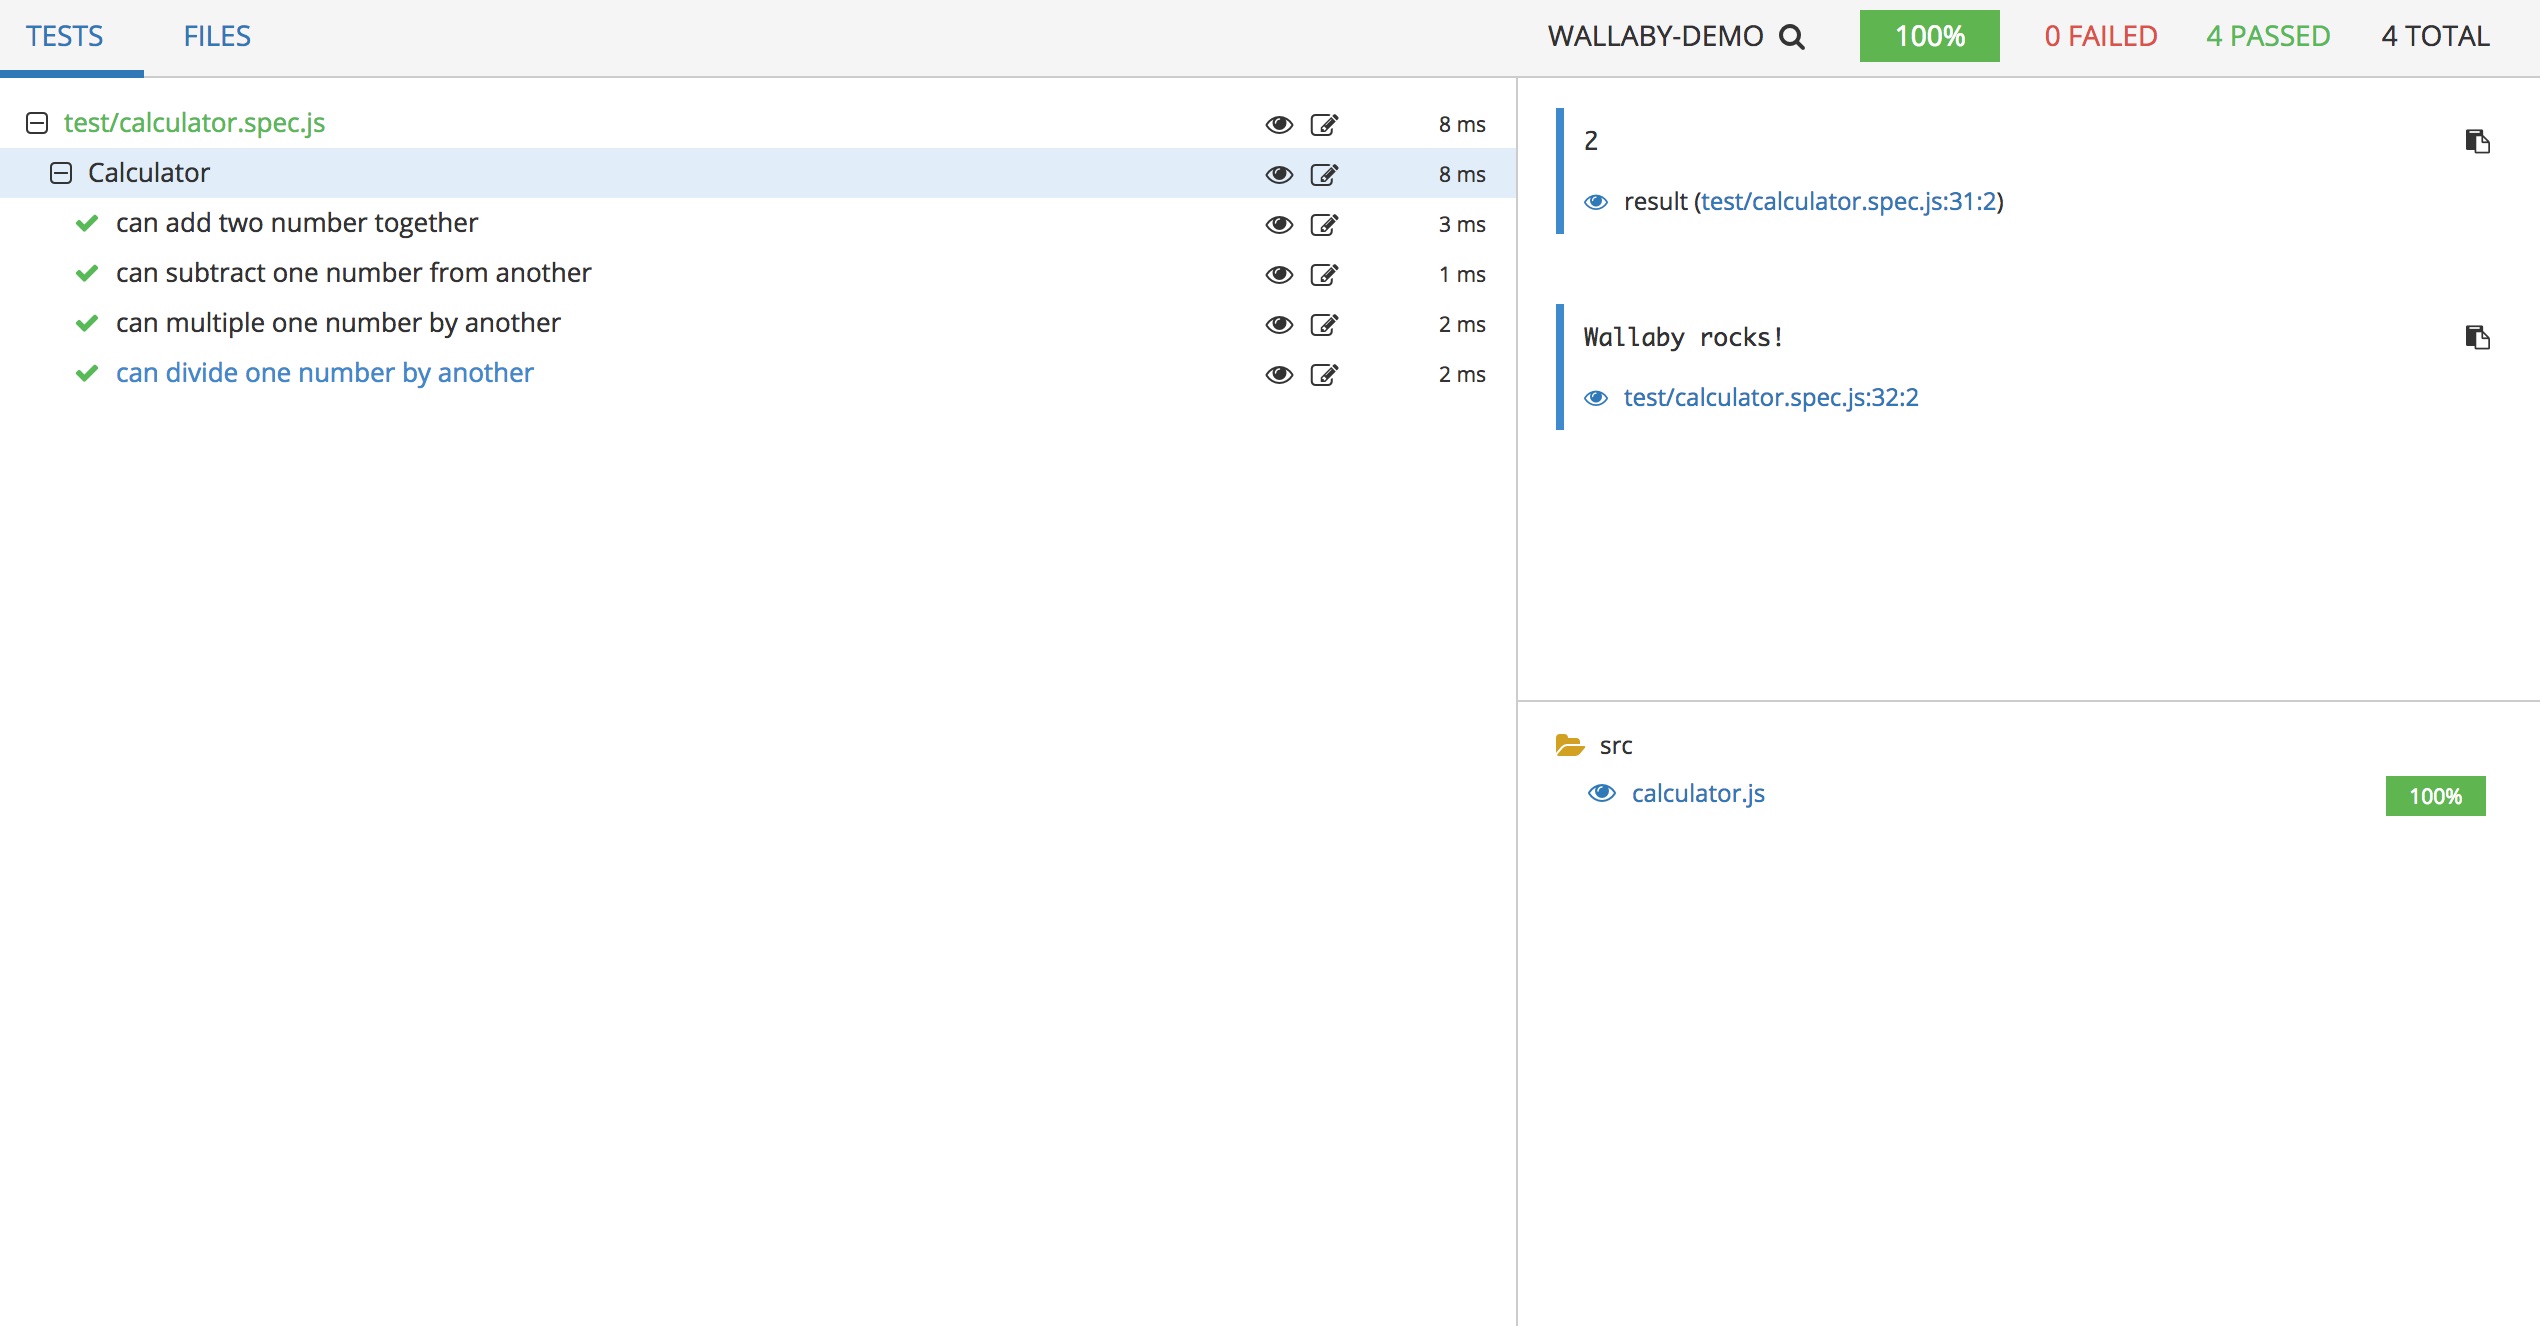
This can be especially helpful when dealing with “Expected X to be Y” types of failures as we can immediately see the state of any variable. Finally, we also get access to the Wallaby app which runs at http://localhost:51245 or http://wallabyjs.com/app whilst the plugin is running. This tool lets us see code coverage reports, as well as navigating directly to a specific test (which is useful for failing tests in large projects) with the click of a button.
By this point, you’re probably raring to try out Wallaby and reap the benefits of it just as we have done in the OVO Tech team. We’re still in the early stages of adoption, so it is important to keep in mind that there is always going to be the learning curve of configuring Wallaby to work for your project. Fortunately, there are so many different example repositories on the Wallaby Github page that take a lot of the pain away from the process. The contributors to the project are very active in debugging problems if you submit an issue pointing to an example repository, too.
Go and give Wallaby a go today and let us know what you think!